Moving Google Contacts and Calendar to NextCloud
I have used a lot of Google products in the past and to this day still do. I have used Google Maps, Youtube, Gmail, Hangouts, Meet and a lot more in the past. I tried to de-google myself from more and more services, mainly because of concerns that all my data is behind one account, not controllable by me. There are some horror stories available from people getting locked out from their Google account for apparantly no reason. This and other stories like it are the reason why I took matter into my own hands.
In this blogpost I will take you along for the ride to set up Nextcloud for contact and calendar synchronization. I haven’t used Nextcloud yet when I started writing this blogpost. It seems overkill to use Nextcloud for this purpose alone, but I plan on using more of the suite in the future. For now we are focussing on setting up Nextcloud for contacts and calendars and migrating the data from Google.
Nextcloud is an open source productivity platform where you can hook in a lot of different applications. From office, contacts, calendars to video calls, website building and a kanban board. It is a very powerful tool to have in your selfhosted heaven!
One of the reasons I’ve chosen for Nextcloud, is because it gives me a great peace of mind that there is a whole community surrounding this tool, as well as the copyleft license. If something ever happens to Nextcloud, you can be sure that you have plenty of time to migrate to other services, or that it will be forked and continue being worked on by others.
If you have read my previous blogposts, you will know that I love managing my services in Docker compose. It is easy to setup, gives plenty of control and setting it up on another server is pretty fast. So that’s what I am going to start with: setting up a Docker compose file. We will be using the linuxserver.io docker image, since it is stable and pretty popular in the selfhosted community.
First: we will set up a docker-compose.yml file. You can put this file wherever you want, but it is a good idea to keep it organized. Nextcloud uses two folders: one to keep its data and one for the configuration. I made these in /volume1/docker/Nextcloud and /volume1/docker/config/Nextcloud respectively.
Nextcloud works best if you use a dedicated database for it. We will be using MariaDB for this, since it’s the one Nextcloud recommends. We will need a folder where the database can store it’s data, so therefore I made this folder: /volume1/docker/config/MariaDB.
Then we need to know the user id and group id, so the filepermissions can be set correctly in Docker. This is very easy to find out, by issueing the following command in the terminal:
$ id $user
uid=1024(admin) gid=100(users) groups=100(users),101(administrators),65537(docker)
We need to know the uid (1024 in this example) and the gid (here it is 100).
Then we construct the following Docker compose file; make sure to change the volumespaths, the PUID to the uid and the PGID to the gid:
|
|
As you can see, this docker compose is a little bit more substantial. That’s because it also includes MariaDB. You probably should change the MYSQL_ROOT_PASSWORD to something a little more secure and randomized then what I have used in the example above.
Notice that I’ve mapped port 443 (which is the default HTTPS port) and remapped it to 4433. I’ve made this change, because I have a reverse proxy set up, which occupies this port. Therefore I had to change it and 4433 seems easy and suitable enough for me. If you do not plan to use a reverse proxy and keep Nextcloud local, you can just leave it at 443.
We can now start Nextcloud using this very simple command: docker-compose up -d, which should start Nextcloud and MariaDB in the background.
If everything went as expected, you should now be able to go to the browser and type in: https://localhost:4433 (or leave the :4433 portion of the url out, if you have used 443). Change localhost to the ip address of the system it is running on, if it’s a different computer or server and you should get to the wizard of Tautulli to set it up with Plex.
You will be greeted with a first time wizard to set up your admin account. You should use a very secure password for this login, as a lot of highly sensitive data will be stored on your Nextcloud instance. There is also a button to change out the default database. Open this and select MySQL or MariaDB. Change out your host to localhost, the username and password to nextcloud and the database name to nextclouddatabase. You can now login to Nextcloud.
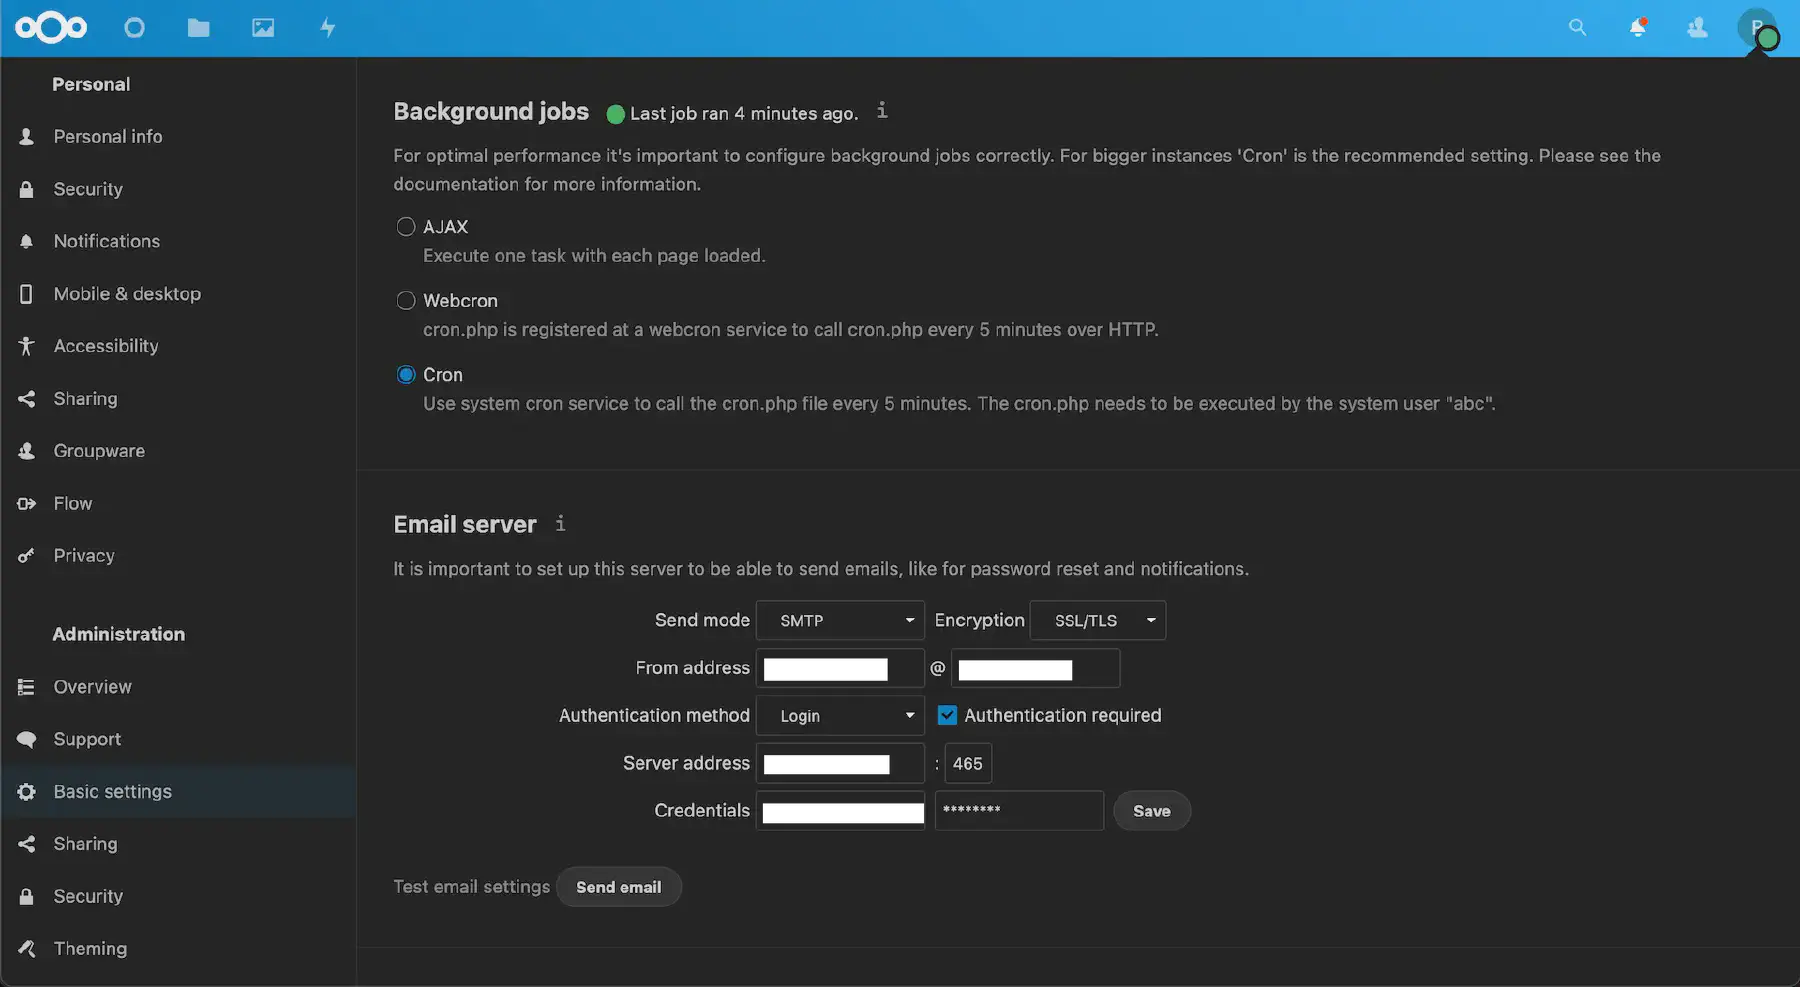
When that’s done, you need to be able to receive e-mails from Nextcloud, for example when you’ve lost your password. Therefore it’s important we set it up as soon as possible. To do this, start by clicking on your profile initial in the top right corner and select Settings. Then under administration, select Basic Settings and set up the SMTP server of your e-mail. You can probably find the settings for this under account settings in your mail client, but if you are using a high-profile mailserver, such as Fastmail or Outlook, you can just ‘duck it’.
If you want to be able to sync your contacts while you are away from home, we need to set up remote access. You probably want to use a reverse proxy for this, which maps a (sub)domain to your Nextcloud docker instance. I will not go into how to set this up in this blogpost, but I may write about this in the future.
When you have set up a reverse proxy, you need to whitelist the domain in Nextcloud. This is done by adding a line to the trusted_domains in the config.php file. The file is located in the config folder of Nextcloud, which for me is located under /volume1/docker/config/Nextcloud/www/nextcloud/config/config.php. Open this file and add the following under trusted_domains:
|
|
If you have set it all up correctly, you should now be able to access Nextcloud from the world wide web!
The first thing you need to, if you’ve not done it already, is install the Contacts and the Calendar app in Nextcloud. In the Nextcloud interface, click in the top right corner on your profile symbol and select Apps. They should be in the Featured apps tab, where you can install and enable them with one press of the button.
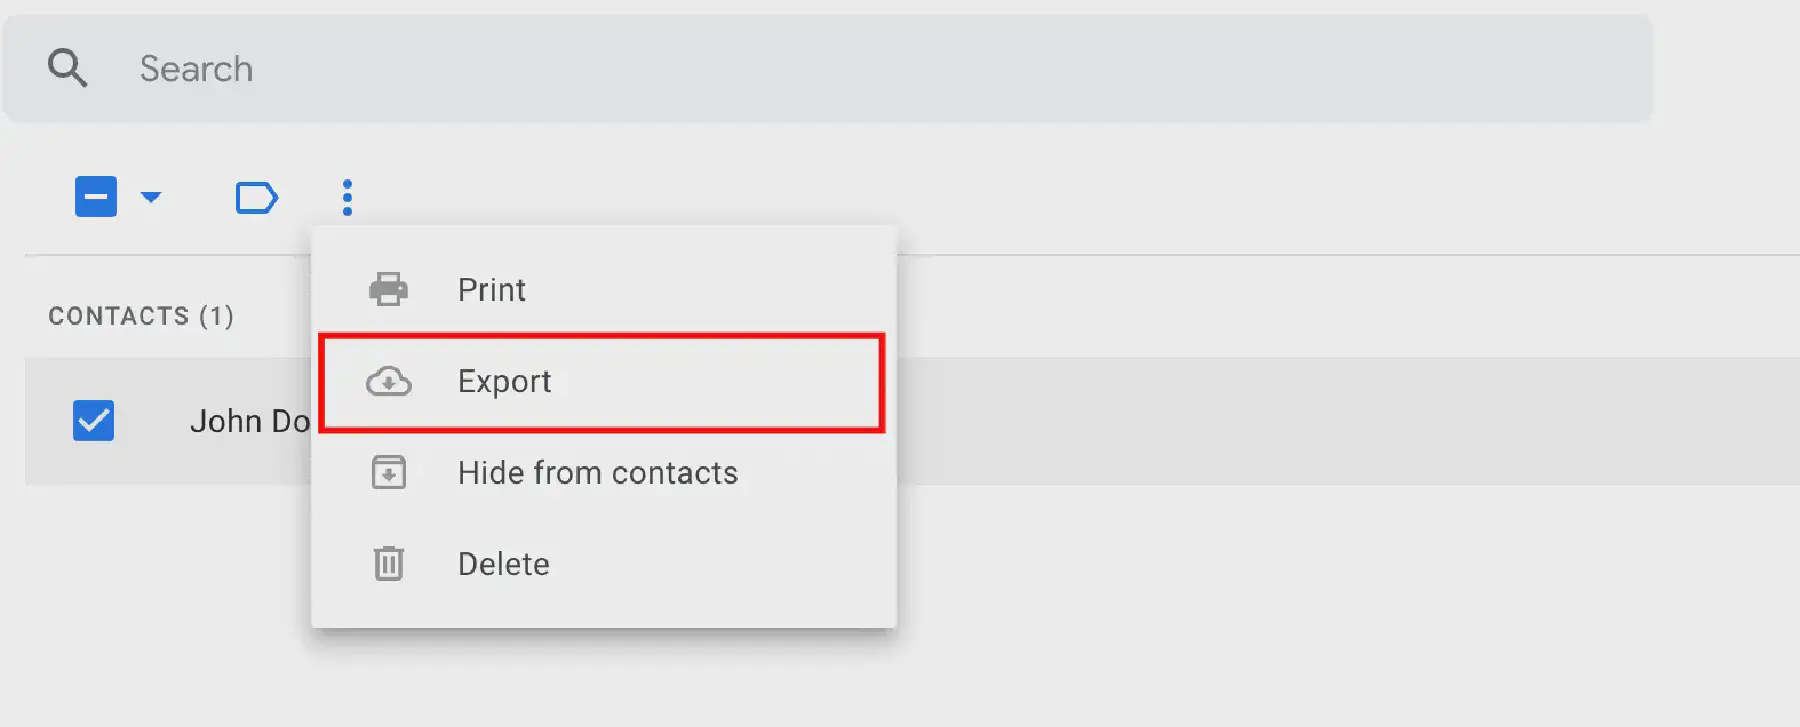
When that’s done, we can finally start importing some stuff into Nextcloud. Exporting your contacts from Google is simple enough. Go to your (Google contacts)[https://contacts.google.com], select the contacts you want to export, press the three dots and select Export. You will now download the contacts. Export it as a vCard file, which can be imported into Nextcloud.
To import it, in your Nextcloud instance, click in the top menu on Contacts. Click the settings in the bottom left corner and press it. Click Import Contact and select Select local file. Now open the just downloaded vCard file and Nextcloud will take care of the rest.
When done, all your contacts should now be in your control, awesome! You could delete them from Google account now if you prefer, or keep them there for the time being.
The proces for your calendar is very similar to that of the contacts. To export your calendar from Google, go to your (Google Calendar)[https://calendar.google.com]. On the left, all your calendars should be listed in the interface. Hover over the calendar you want to export and click on the tree dots that appear. Click Calendar Settings. From there you can click the Export calendar button, which will export all your appointments, past, present and future, to a zip file.
When you unpack the downloaded zip file, there will be one or more ics files, one for each calendar. These can be imported into Nextcloud. In your Nextcloud dashboard, click on Calendar. Then in the bottom left corner, click Settings & import and click on Import calendar. Now open your just downloaded ics files and it will import all your appointments. It can take a few minutes, so be patient if you are not seeing your appointments immediately.
In true Degoogle-fashion, we will install an open source tool to sync our contacts and calendar to our phone. We can use F-Droid, an alternative app store for Android, but the app is also available in the Google Play store and it’s called DAVx by Bitfire web engineering. Install this app and open it up. The first time you start it, you may see some prompts to disable battery saving for this app. Do this and continue.
You can now start adding an account, by clicking on the little + icon in the app. When you are on the Add account screen, select Login with URL and user name and fill in your username and password. We need to grab the Base URL from Nextcloud. Go to your Nextcloud dashboard, click on calendar and click on Settings & Import. Click on Copy primary CalDAV address. Paste this address somewhere so you can type it over on your phone. It should look something like this: https://your-address/remote.php/dav.
When you have all your information filled into DAVx, we can now click on Login and voilá: our contacts and calendar will be synced! :)
Setting up Nextcloud is not the easiest thing in the world, we have seen now, but it is incredibly powerful and has a lot more to offer than just Contacts and Calendar. I will be exploring more features in the future, but for now this is enough. I encourage you to try out F-Droid and explore what open source alternatives there are for your apps. As always, the Docker compose file is available on the Selfhosted Heaven github page. If you have any questions or feedback, just leave a comment below!


